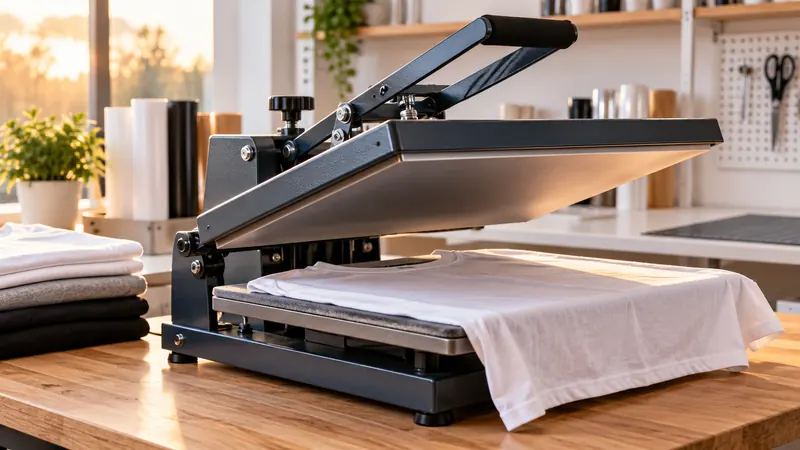
Learning how to use a heat press starts with one rule: follow the instructions for the exact transfer material and blank you are pressing. HTV, DTF, sublimation, transfer paper, patches, and specialty transfers can require different temperature, time, pressure, protective materials, and peel methods. A heat press supplies the heat and pressure, but the transfer manufacturer determines the application process.
The general workflow is straightforward. Prepare the machine and substrate, position the transfer, apply the documented settings, complete the correct peel or finishing step, and inspect the result after cooling. The details change with each transfer system.
What You Need Before Using a Heat Press
Gather the materials and information before turning on the machine:
- Heat press with a suitable platen or attachment
- Compatible transfer, such as HTV, DTF, sublimation paper, transfer paper, or a heat-applied patch
- Suitable garment or blank
- Manufacturer instructions for the exact transfer
- Protective sheet or paper specified for that process
- Heat-resistant handling tools where necessary
- Lint roller, scissors, weeding tools, or alignment tools as required
Check the garment or blank for seams, pockets, zippers, buttons, coatings, and other raised areas. These features can prevent the transfer from making consistent contact with the platen. Confirm that the transfer is compatible with the substrate before pressing.
Heat Press Terms to Understand
Temperature
The controller setting is the temperature selected on the machine. It does not automatically prove that every part of the upper platen has reached that temperature. Platen temperature can vary by location, machine condition, measurement method, and stabilization time.
Use the exact temperature listed by the transfer manufacturer. A higher setting is not a safe substitute for the specified process. Excess heat can affect the transfer, garment, coating, dye, or raised finish.
Pressing time
Pressing time is the length of the application cycle. It works together with temperature, pressure, transfer construction, and substrate. A shorter or longer cycle may be required by a particular product, so do not apply one universal time to every transfer category.
Pressure
Pressure describes how firmly the platens close against the transfer and substrate. Terms such as light, medium, and firm pressure are relative instructions, not universal PSI measurements. A pressure knob position also has different meanings on different machines.
Set pressure according to the transfer instructions and the machine manual. Avoid forcing the press closed against thick objects, hard seams, or a blank that the machine is not intended to accept.
Peel method
The carrier or transfer film may require a hot, warm, or cold peel. These terms are product-specific. Removing the carrier at the wrong time can cause lifting, distortion, incomplete adhesion, or damage to the design.
How to Use a Heat Press Step by Step
1. Identify the transfer and substrate
Determine whether you are applying HTV, DTF, sublimation, transfer paper, a patch, rhinestones, or another system. Then identify the substrate, such as cotton, polyester, nylon, canvas, a coated blank, leather-like material, or a sublimation-ready surface.
Read the instructions for both materials. A transfer that works on cotton may require different handling on polyester or may be unsuitable for nylon. A heat-tolerant blank is not automatically compatible with sublimation or every adhesive system.
2. Prepare the press
Place the heat press on a stable, heat-resistant work surface with enough room to load the garment safely. Check the machine’s electrical requirements in its manual. Voltage, plug type, amperage, and circuit requirements should never be assumed from appearance or wattage alone.
Inspect the upper platen, lower pad, and protective materials. Remove loose residue only with a cleaning method approved for those surfaces. Make sure the lower pad is seated correctly and that the platen can close without obstruction.
3. Set the documented temperature and time
Enter the temperature and time specified for the exact transfer product. If the instructions provide a pressure description, use the machine’s adjustment method to approximate that instruction without treating the setting as a calibrated pressure value.
Allow the press to reach its displayed set temperature. A controller reading indicates what the machine is reporting, not a verified temperature at every point on the platen.
4. Prepare and position the garment or blank
Place the substrate on the lower platen so the design area is flat and supported. Keep seams, collars, pockets, zippers, drawstrings, buttons, and thick hems away from the pressing area where possible.
For garments, place the fabric so the transfer will not contact another layer unless the transfer instructions specifically allow that arrangement. A shirt folded over the lower platen can receive adhesive or ink on the back panel.
Use the alignment method appropriate for the project. Check the design’s orientation before pressing. For HTV, the carrier side generally faces upward, but the exact construction of specialty materials should be confirmed in the product instructions.
5. Pre-press only when the process calls for it
Some workflows use a brief pre-press to remove moisture or flatten the surface. Others do not require one, and some materials need specific handling that makes a generic pre-press inappropriate. Follow the instructions for the transfer and substrate rather than applying the same pre-press routine to every project.
6. Apply the transfer
Position the transfer and protective material as directed. Close the press smoothly and apply the documented pressure for the specified cycle. Keep hands, fingers, clothing, and loose objects away from the closing area and hot platen.
Do not extend the time or raise the temperature simply because the transfer looks uncertain during the cycle. A change to one process variable can affect the entire temperature, time, pressure, and material relationship.
7. Open the press and follow the peel instructions
Open the press after the cycle. If the machine has an auto-open function, that function only describes how the press releases after the cycle. It does not determine the transfer’s peel method.
Remove the carrier at the temperature or stage specified by the transfer manufacturer. Pull at the recommended angle and pace without stretching the garment or disturbing the design.
8. Complete any required finishing press
Some transfers require a finishing step with a cover sheet, while others do not. The finishing material, duration, pressure, and temperature must come from the product instructions. Repressing can change the appearance of a specialty finish or affect the garment, so do not use it as an automatic correction for poor adhesion.
9. Inspect the finished application
Look for lifted edges, incomplete adhesion, wrinkles, pinholes, distortion, scorching, dye migration, or areas that did not receive proper contact. Let the item cool as directed before stretching or washing it.
If the result is poor, record the transfer product, substrate, displayed temperature, time, pressure description, peel stage, and placement conditions. This information makes process troubleshooting more useful than changing several variables at once.
Adjusting the Process for Common Transfer Types
| Transfer type | What requires product-specific instructions | Important limitation |
|---|---|---|
| HTV | Temperature, time, pressure, peel method, layering, and substrate compatibility | Different vinyl lines can use different adhesives, carriers, finishes, and application requirements. |
| DTF | Temperature, time, pressure, peel method, and any finishing press | Hot, warm, and cold peel instructions are not interchangeable. |
| Sublimation | Temperature, time, pressure, paper handling, and substrate requirements | The blank must have a suitable polyester surface or compatible sublimation coating. Heat tolerance alone is insufficient. |
| Transfer paper | Printer type, image orientation, temperature, time, pressure, and carrier removal | Inkjet and laser transfer papers are different systems and should not share instructions automatically. |
| Patches | Adhesive type, temperature, time, pressure, and garment compatibility | Some patches are sewn, pressure-sensitive, hook-and-loop, or otherwise unsuitable for heat application. |
| Rhinestone transfers | Adhesive system, temperature, time, pressure, and carrier removal | Stone and carrier construction can vary between products. |
Using Different Heat Press Designs
Clamshell press
A clamshell press opens upward from a rear hinge. Load the substrate carefully so your hands remain clear of the heated upper platen. Thick seams and raised areas can affect contact beneath the hinged platen.
Swing-away press
A swing-away press moves the upper heating assembly laterally away from the lower platen. This changes the loading position and the space needed around the machine. Follow the manufacturer’s instructions for moving the upper assembly and closing the press.
Slide-out or drawer press
A slide-out press moves the lower platen or loading surface outward. This can change how the garment is positioned during loading, but it does not prove that pressure or heat is uniform across the platen.
Auto-open press
An auto-open press releases or opens after a timed cycle according to its design. Auto-open operation does not mean that the machine performs every setup, positioning, pressure, or finishing action automatically.
Hat, mug, and tumbler attachments
Curved items need suitable support and contact. A cap press, mug attachment, or tumbler heater must match the blank’s shape and dimensions. A flat platen does not automatically provide even contact around a curved crown, mug, or tumbler.
Safety Practices for Heat Press Use
- Keep the heated platen and attachments away from skin, cables, paper piles, and other combustible materials.
- Use a stable work area with enough room to load and unload the press.
- Follow the exact electrical requirements in the machine manual.
- Do not bypass grounding, thermal protection, fuses, or other safety components.
- Do not open energized electrical components or modify internal wiring.
- Allow blanks and attachments to cool before handling them without suitable protection.
- Follow the manufacturer’s shutdown procedure after use.
- Stop operation if you see sparking, melted wiring, abnormal smoke, or a persistent burning electrical odor.
Packaging residue, transfer material, protective paper, garment treatments, and adhesive can produce odors during heating. Unexplained smoke or an electrical burning smell should not be treated as normal. Disconnect power when safe, allow the press to cool, and contact the manufacturer or a qualified service provider.
Why Heat-Pressed Transfers Fail
Edges are lifting
Check the exact transfer settings first. Incorrect temperature, time, pressure, or peel timing can affect adhesion. Then inspect the substrate for moisture, contamination, coatings, seams, or uneven contact. Do not immediately raise the temperature or press the item again unless the product instructions support that correction.
DTF is not sticking
Verify the transfer supplier’s instructions, peel method, substrate, displayed temperature, pressing time, pressure, and any required finishing cycle. Check that the design was placed on a flat area and that the transfer was not obstructed by a seam or garment feature.
Sublimation looks pale
Check that the blank is intended for sublimation and that its polyester content or coating is suitable. Other possible factors include moisture, paper movement, ink, image preparation, color management, pressure, time, temperature, or transfer alignment. Increasing heat without identifying the cause can damage the blank or worsen color problems.
The garment has a mark
A visible mark may result from platen edges, seams, pressure impressions, moisture, heat sensitivity, dye behavior, or contamination. The appearance alone does not prove scorching. Compare the mark with the garment construction and process instructions before attempting another press.
One area seems cooler
First distinguish heat variation from poor contact. A seam, pocket, thick hem, lower-pad problem, or transfer position can create an application difference without proving that the platen has a cold spot.
A single temperature reading cannot establish full-platen uniformity. If testing is necessary, use a suitable measurement method and compare multiple locations, such as the center, edges, and corners, after the readings have stabilized. Infrared thermometers can be affected by emissivity, reflectivity, distance, spot size, angle, and surface coating. Contact probes and temperature strips have their own placement and surface limitations.
Testing Versus Calibrating a Heat Press
Testing measures or compares the machine’s behavior. Calibration involves adjusting the controller or system against a reference. Measuring the platen does not automatically calibrate the press.
Some machines have no user-accessible calibration adjustment. If the displayed temperature and a suitable measurement method differ materially, consult the exact machine manual or manufacturer support. Do not invent controller offsets, hidden button sequences, internal adjustments, or electrical repairs.
Testing heat distribution also requires more than a center reading. Multiple locations and repeated measurements provide more useful information, but the result still depends on the measurement tool and method. Temperature range, displayed temperature, actual surface temperature, and temperature accuracy are separate concepts.
Cleaning and Routine Care
Keep the upper platen, lower pad, protective sheets, and loading area free of transfer residue. The correct cleaning approach depends on the contaminated surface and the material involved. Follow the machine documentation before using a scraper, solvent, adhesive remover, alcohol, abrasive product, or other chemical.
Disconnect power when the manual requires it and allow hot components to cool before cleaning. Do not touch a hot platen or use an unapproved chemical to remove adhesive. Inspect the lower pad for damage, confirm that it remains properly positioned, and replace protective materials when they become contaminated or worn.
Sublimation ink contamination deserves special attention. Ink can transfer to later projects through contaminated paper or protective materials. Use fresh or process-appropriate protective materials where the sublimation workflow calls for them, and avoid reusing a sheet that could transfer unwanted dye or adhesive.
Frequently Asked Questions
Can I use the same heat press settings for every transfer?
No. Settings depend on the exact transfer product, substrate, machine, pressure, and peel or finishing instructions. Use the current instructions for the specific material.
Does a higher temperature make a transfer adhere better?
No. Excess heat can damage the transfer, substrate, coating, dye, or finish. Temperature, time, pressure, and peel method work as a process, so change a setting only when the product instructions support it.
Can I press over a pocket or seam?
Uneven garment features can prevent consistent platen contact. Position the design away from seams, pockets, zippers, and thick areas when possible. If the design must cross an obstruction, follow guidance for that garment and transfer combination.
How do I know whether my press temperature is accurate?
A displayed temperature is not proof of actual platen temperature. Use a suitable measurement method, account for its limitations, and test multiple locations if heat distribution is the question. Contact the manufacturer for machine-specific calibration information.
Can I use a flat press for hats, mugs, or tumblers?
Only when the machine, attachment, and blank are compatible with the item’s shape. Curved objects require suitable contact around the application area. Verify dimensions and instructions instead of assuming that a flat platen can press every curved blank.
Successful heat pressing depends on matching the transfer, substrate, machine, and application instructions. Set the documented conditions, create solid contact, use the correct peel method, and troubleshoot the complete process before changing the press itself.
